There are different options for getting automatic AI notes from your Teams meetings.
Microsoft has created a feature called Intelligent Recap for this purpose, but only for Teams Premium Users.
Just because Microsoft has their own solution, doesn't mean it's necessarily the best one.
Below, you'll see step-by-step guides for Microsoft's native notetaker tool, but also for Wudpecker's more simple alternative.
Option 1: Use Microsoft Teams AI Note Taker
Step 1: To use this feature, you need a premium user license of MS Teams. Make sure you have the right subscription plan.
Step 2:
- Open Microsoft Teams and schedule your meeting as you normally would.
- Before the meeting starts, ensure that recording and transcription options are enabled. You can do this by going to the meeting options and toggling on "Record and transcribe automatically".
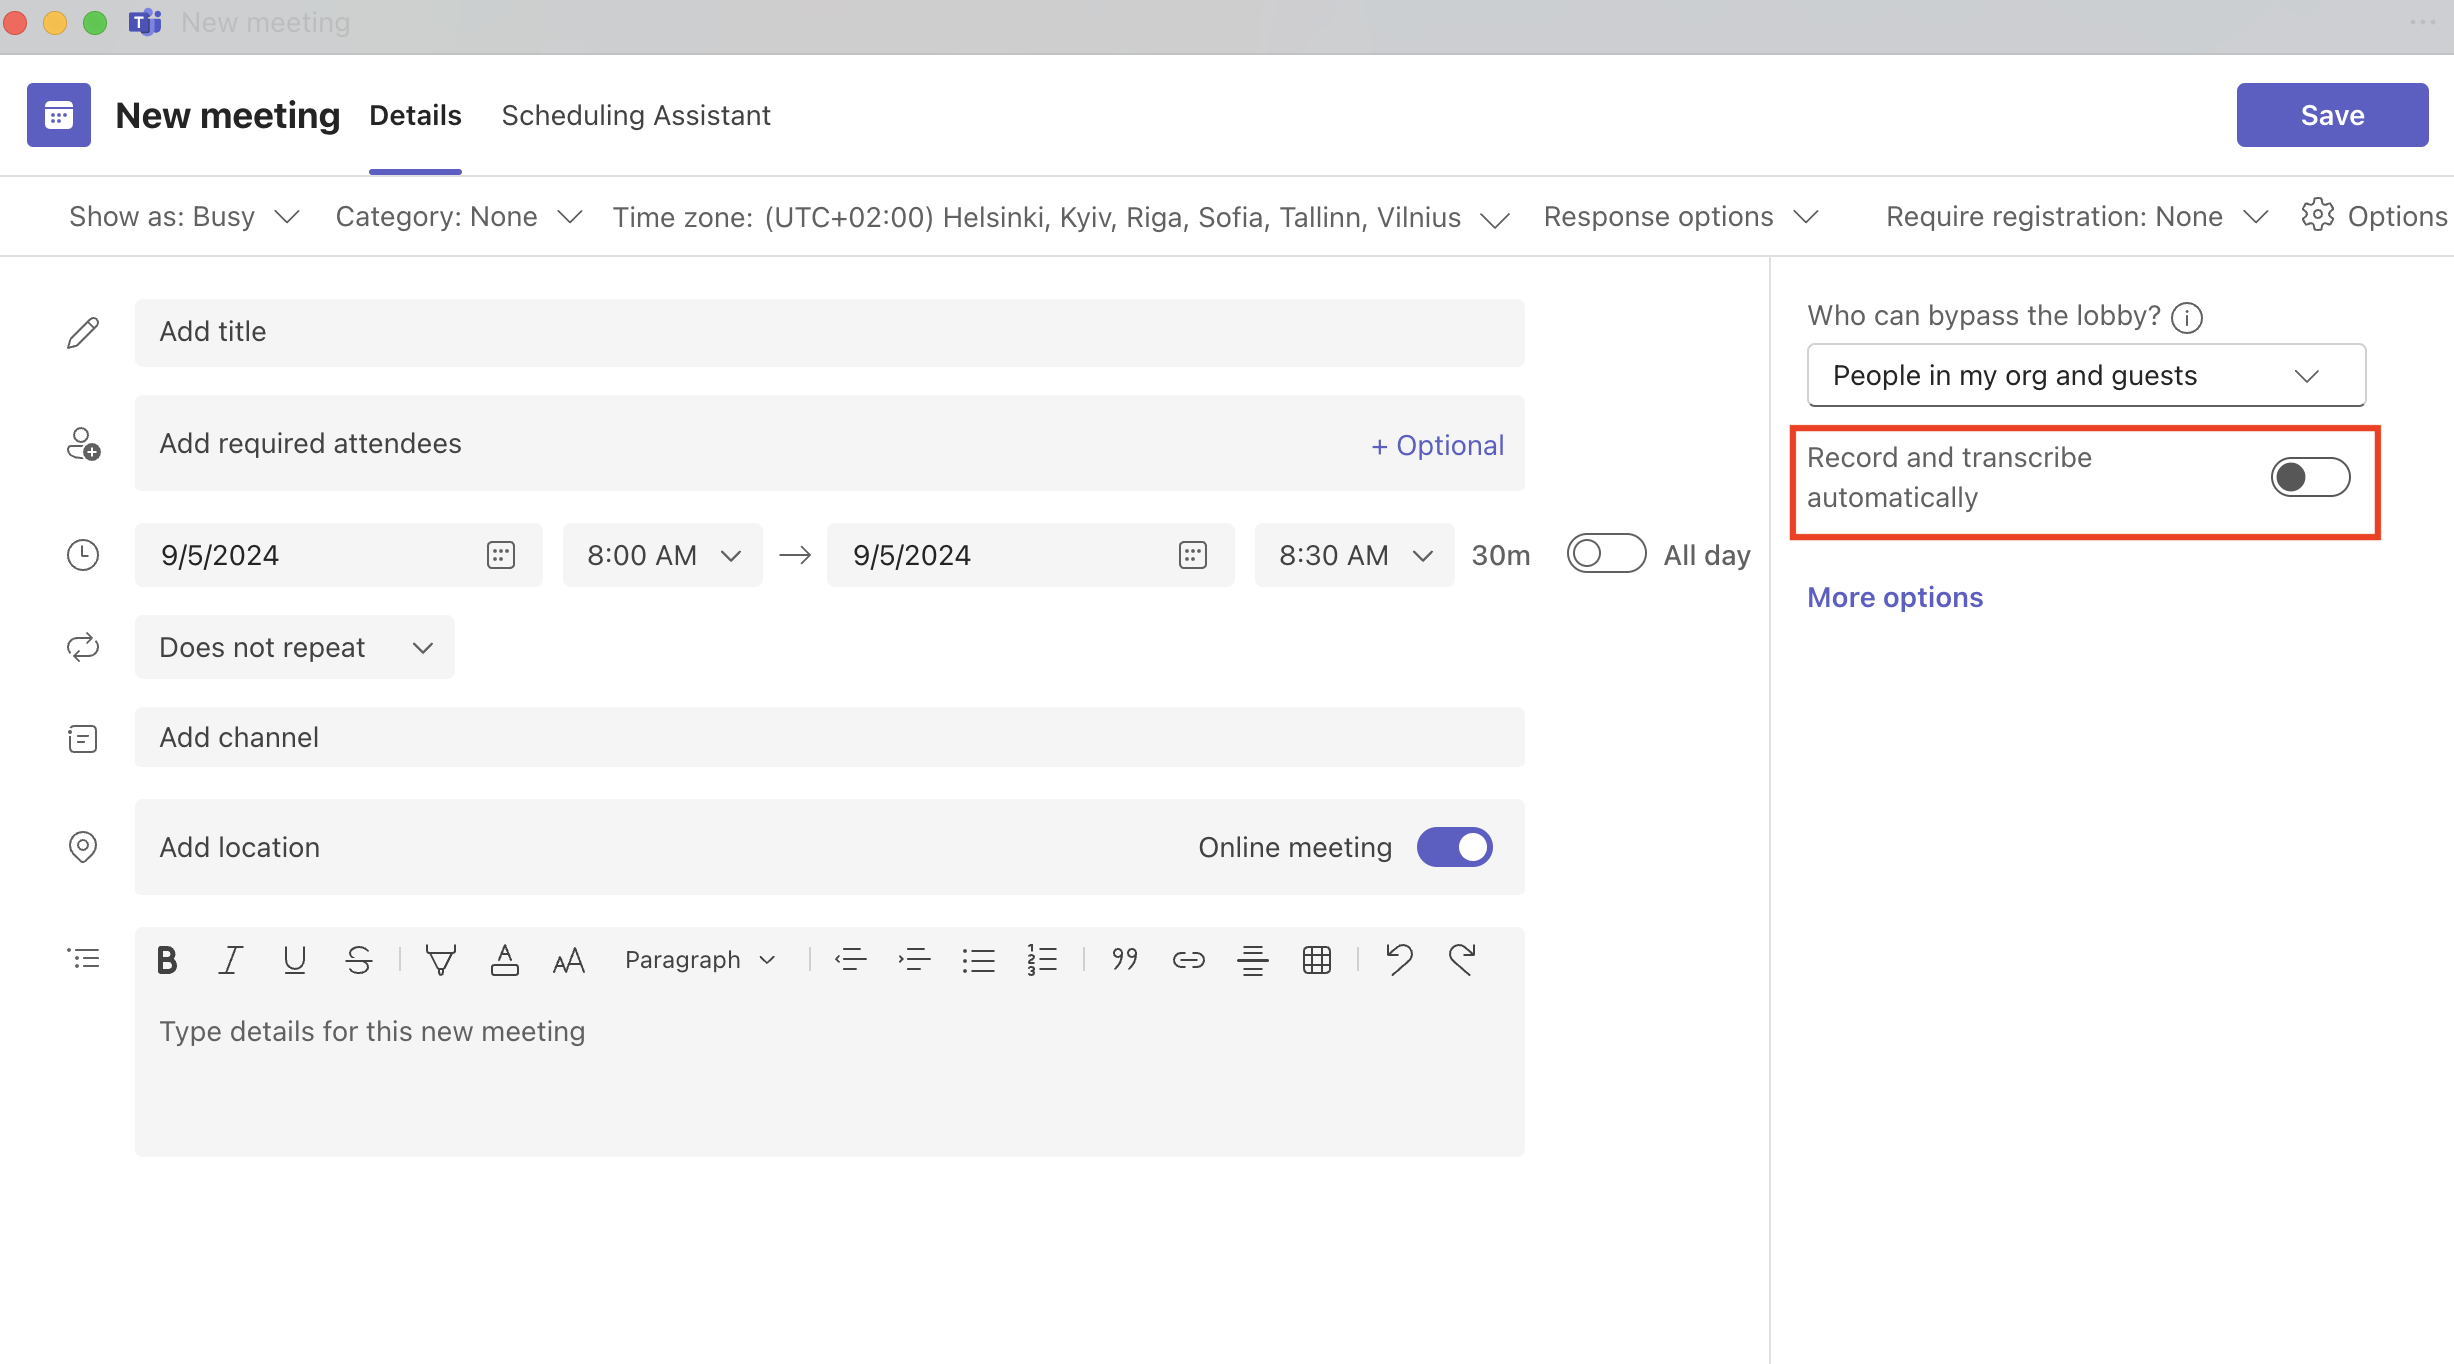
Step 3: Proceed with your meeting as usual. Ensure that all participants are aware that the meeting is being recorded for note-taking purposes.
Step 4: Once the meeting concludes, the recording will automatically be processed by Intelligent Recap. You can access it from the meeting details (which you can go to either from Chat or Calendar in the menu)
Step 5: Now that you've opened the meeting details, the recap can be found in two different ways:
- From the Chat tab ("View recap")
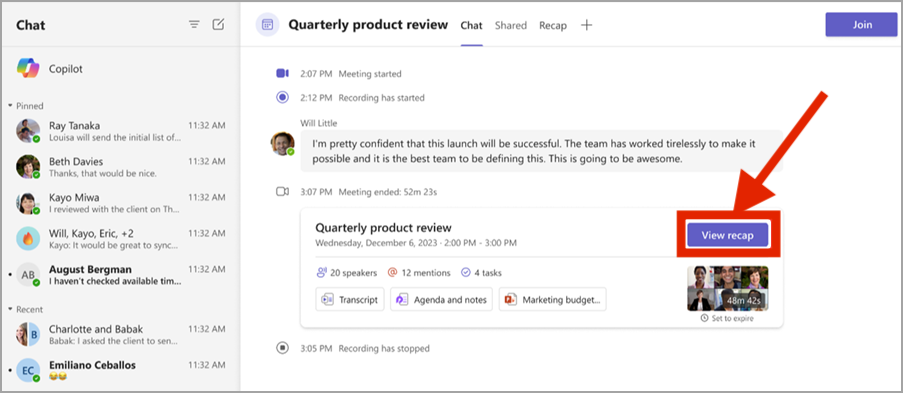
- Or from the Recap tab.
.png)
Now you can view automatically generated meeting notes, including key discussion points, action items, and any follow-up tasks discussed during the meeting.
The recording will also be divided into color-coded chapters based on the topics discussed. You can easily jump to specific sections of the meeting by clicking on these chapters. Review the AI-generated topics to quickly find the parts of the recording that are most relevant to you.
.png)
Option 2: Use Wudpecker's Free Note Taker
Step 1: Sign up to Wudpecker with a Microsoft or Google account.
Step 2: Check that Wudpecker finds your meeting and is set to join it. Read more here if you need further information.
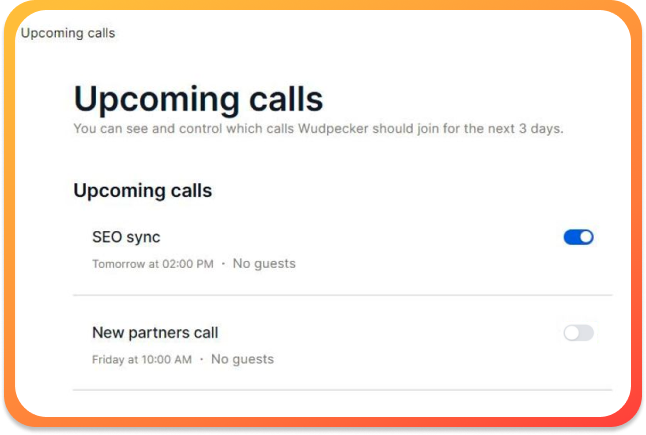
Step 3: Go to your Teams meeting and admit the notetaker in from the waiting lobby. If you're joining the meeting quite late and the notetaker has already left the waiting room, you can use the Invite Notetaker feature.
Step 4: Soon after the meeting ends (after all participants have left), you'll get to enjoy your notes. In your account, navigate to My Calls, and your most recent meeting notes will be at the top of the list.
What can you do with the Wudpecker notes?
(1) Read and edit the AI summary
Wudpecker's notes and their titles are 100% editable. The default content sums up the key points and outcomes of the discussions, and lists any possible action items with deadlines.
If you'd like to change the way the summary is automatically generated without having to make edits yourself, you'll have to first add that call into a collection and change that collection's settings.
.png)
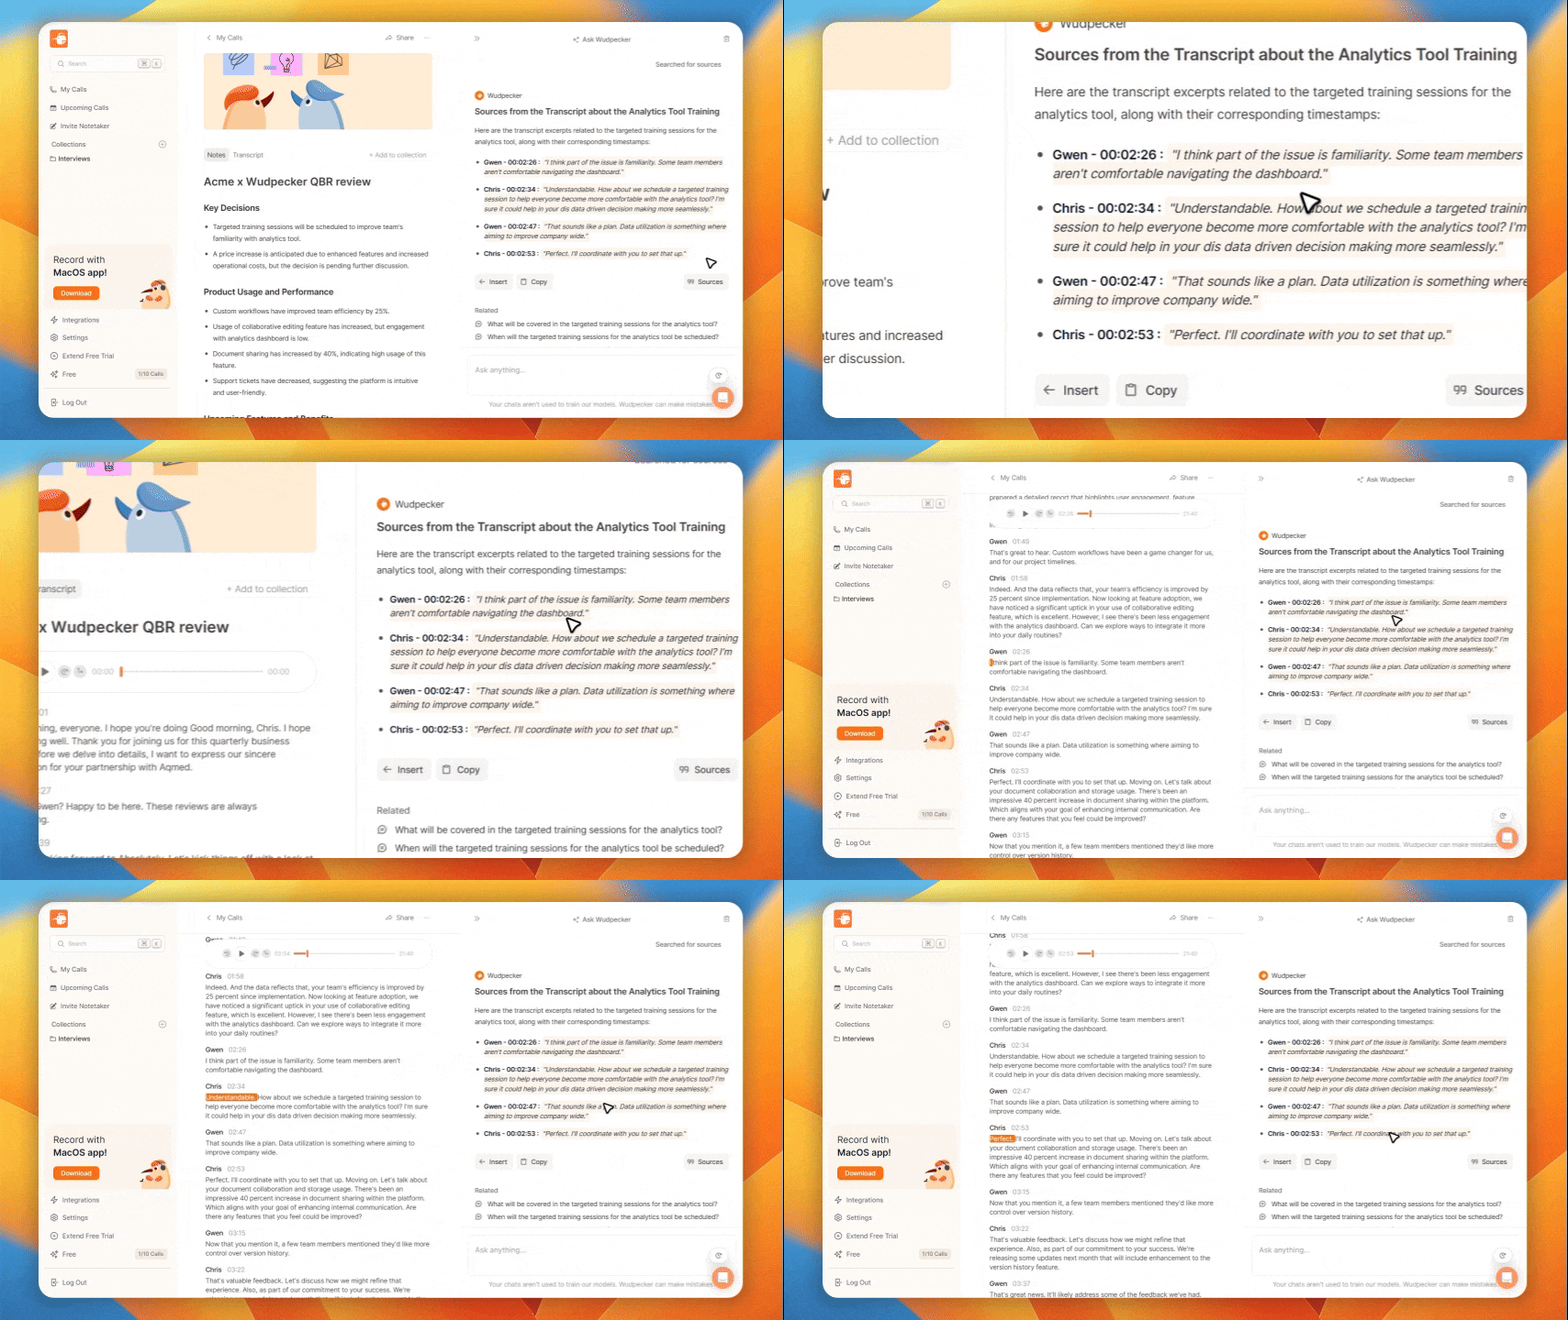
(2) Ask Wudpecker for any information regarding the meeting
If you don't want to read through the entire meeting summary or it doesn’t mention everything you need, Ask Wudpecker is there to help. It can answer any question about your meeting and back you up with quotes from the conversation.
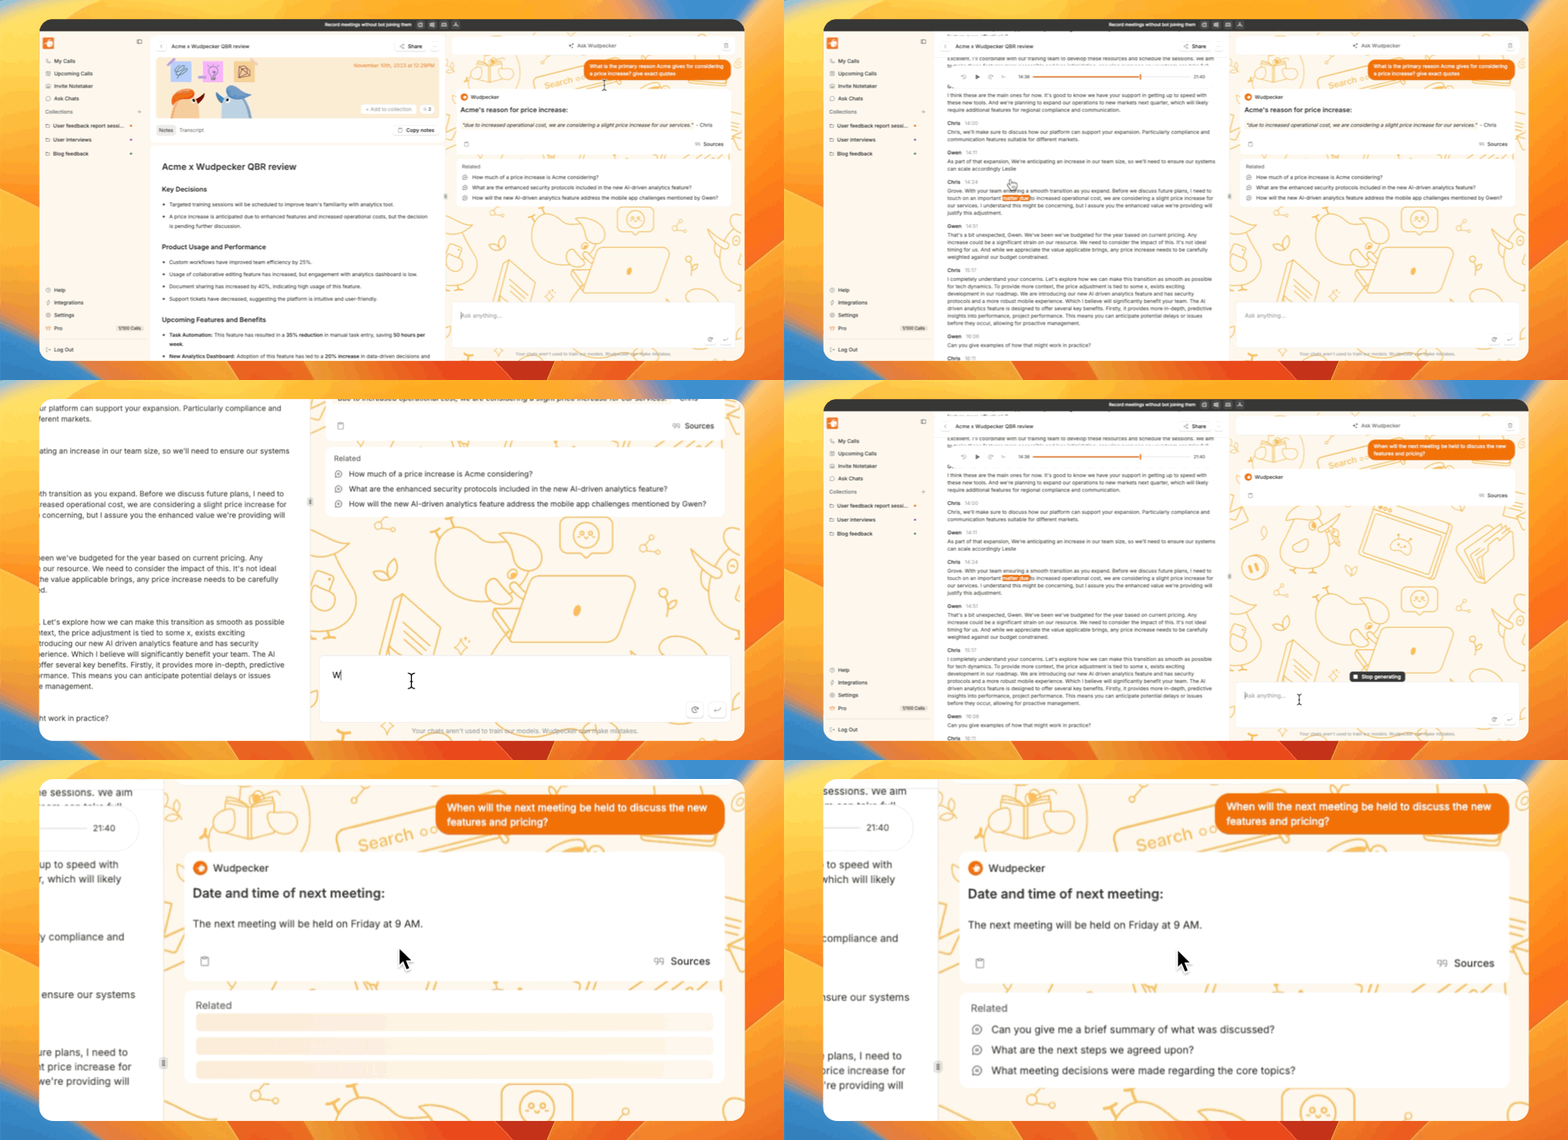
(3) Listen to the audio and read the transcript
Wudpecker provides both the meeting transcript and audio recording in one place. You can scroll through the whole conversation, see and edit speaker names, click on any word to listen to that exact part of the audio, and more.
Pro tip: record bot-free with apps
If you want to record without a bot attending the virtual meeting room, here are your other options:
- Mac and Windows: capture discussions on any virtual platform that you can think of. Wudpecker records both system and microphone audio, so it's not limited to specific services. If you're having a physical gathering, you can also record without joining a virtual meeting room.
- iOS and Android: record on-the-go meetings where it's most practical to rely on the phone. Joining virtual platforms won't be possible but the mobile apps are meant to make it extremely easy to get AI notes even when you don't have a fancy setup.
Best Tools for AI Meeting Notes for Teams Meetings
When comparing different AI meeting note tools, it's essential to consider their features, integrations, and usability. Here's a breakdown of Microsoft Teams' built-in option, Wudpecker's browser and desktop apps, tl;dv's Chrome extension, and Read AI's notetaker bot:
(1) Wudpecker
Features:
- Insight Extraction: Allows users to extract information from one call, all calls, or multiple selected calls using its AI Chat feature.
- Cross-Platform Support: Available as desktop and browser apps (mobile apps for in-person meetings), making it accessible for users on various devices.
- Unlimited Recordings and Storage: Allows you to record an unlimited amount of meetings per month (with desktop and mobile apps). Comes with no time or storage limits for recordings.
Usability: Wudpecker is easy and free to use for individuals and teams in all meeting platforms. It provides flexibility for taking and sharing notes and works on any platform and device.
(2) Microsoft Teams' Built-in Option
Features:
- AI-Generated Notes: Automatically creates notes and follow-up tasks for meetings that are recorded and transcribed. This feature is available for meetings lasting longer than five minutes.
- Speaker Markers: Allows users to identify who spoke and when, making it easier to find specific contributions in the meeting recording.
- Chapters and Topics: Automatically segments the meeting into topics and chapters based on keywords from the transcript, facilitating easy navigation.
Usability: The integration within Microsoft Teams makes it seamless for users already on the platform, but it requires a Teams Premium license for full AI capabilities.
(3) tl;dv
Features:
- Recording App: The tl;dv bot joins your Microsoft Teams meetings to record and transcribe discussions automatically.
- Timestamped Notes: Notes taken during the meeting are linked to specific timestamps in the recording, allowing for easy navigation to key moments.
- Collaborative Note-Taking: All participants can contribute notes, enhancing the collective documentation of the meeting.
Usability: The desktop app makes it easy to start recording with one click, and the collaborative features are beneficial for team environments.
(4) Read AI
Features:
- AI Notetaker Bot: Joins meetings to provide real-time transcription and summarization.
- Actionable Insights: Identifies key discussion points and action items, making follow-up easier.
- Meeting Analytics: Provides additional real-time metrics (e.g. how engaged each participant is)
Usability: Provides many useful features, but all the real-time transcription and analytics might crowd up your screen and feel overwhelming.
Conclusion
Each AI meeting note tool has its strengths:
- Microsoft Teams' built-in option is ideal for users already integrated into the Microsoft ecosystem, especially with the added features of Teams Premium.
- Wudpecker is easy to start using and helps you find information from any previous meeting(s) quickly. It's also suitable for various platforms and environments.
- tl;dv stands out for its collaborative features and ease of use, particularly for teams that value timestamped notes.
- Read AI provides a comprehensive solution with its real-time transcription and analytics, for those who want as much meeting data as possible.
Choosing the right tool depends on your specific requirements, such as the need for collaboration, ease of integration, and the level of AI assistance desired.



.svg)


.png)

.png)


.png)


.png)
.png)


.svg)
