
.png)
Whether you're in a spontaneous meeting, not within your computer’s reach, or simply brainstorming ideas while commuting, having the ability to quickly record on your phone can be a lifesaver.
Even better if you can find a tool that not only records audio but automatically makes notes as well.
We'll show you two easy ways to record meetings on your phone.
- Using your phone’s built-in app for recording audio
- Using the Wudpecker Android app for recording audio and getting AI generated notes
Let’s get started!
How to Record with the Built-In App
To record audio on your Android phone, you can use the modest built-in app.
Here’s a step-by-step guide:
Step 1: Find the Voice Recorder app (the exact name can vary) on your Android device and tap to launch it. If you can’t see the app on your home screen or app drawer, tap Settings > Apps, then search for Recorder.
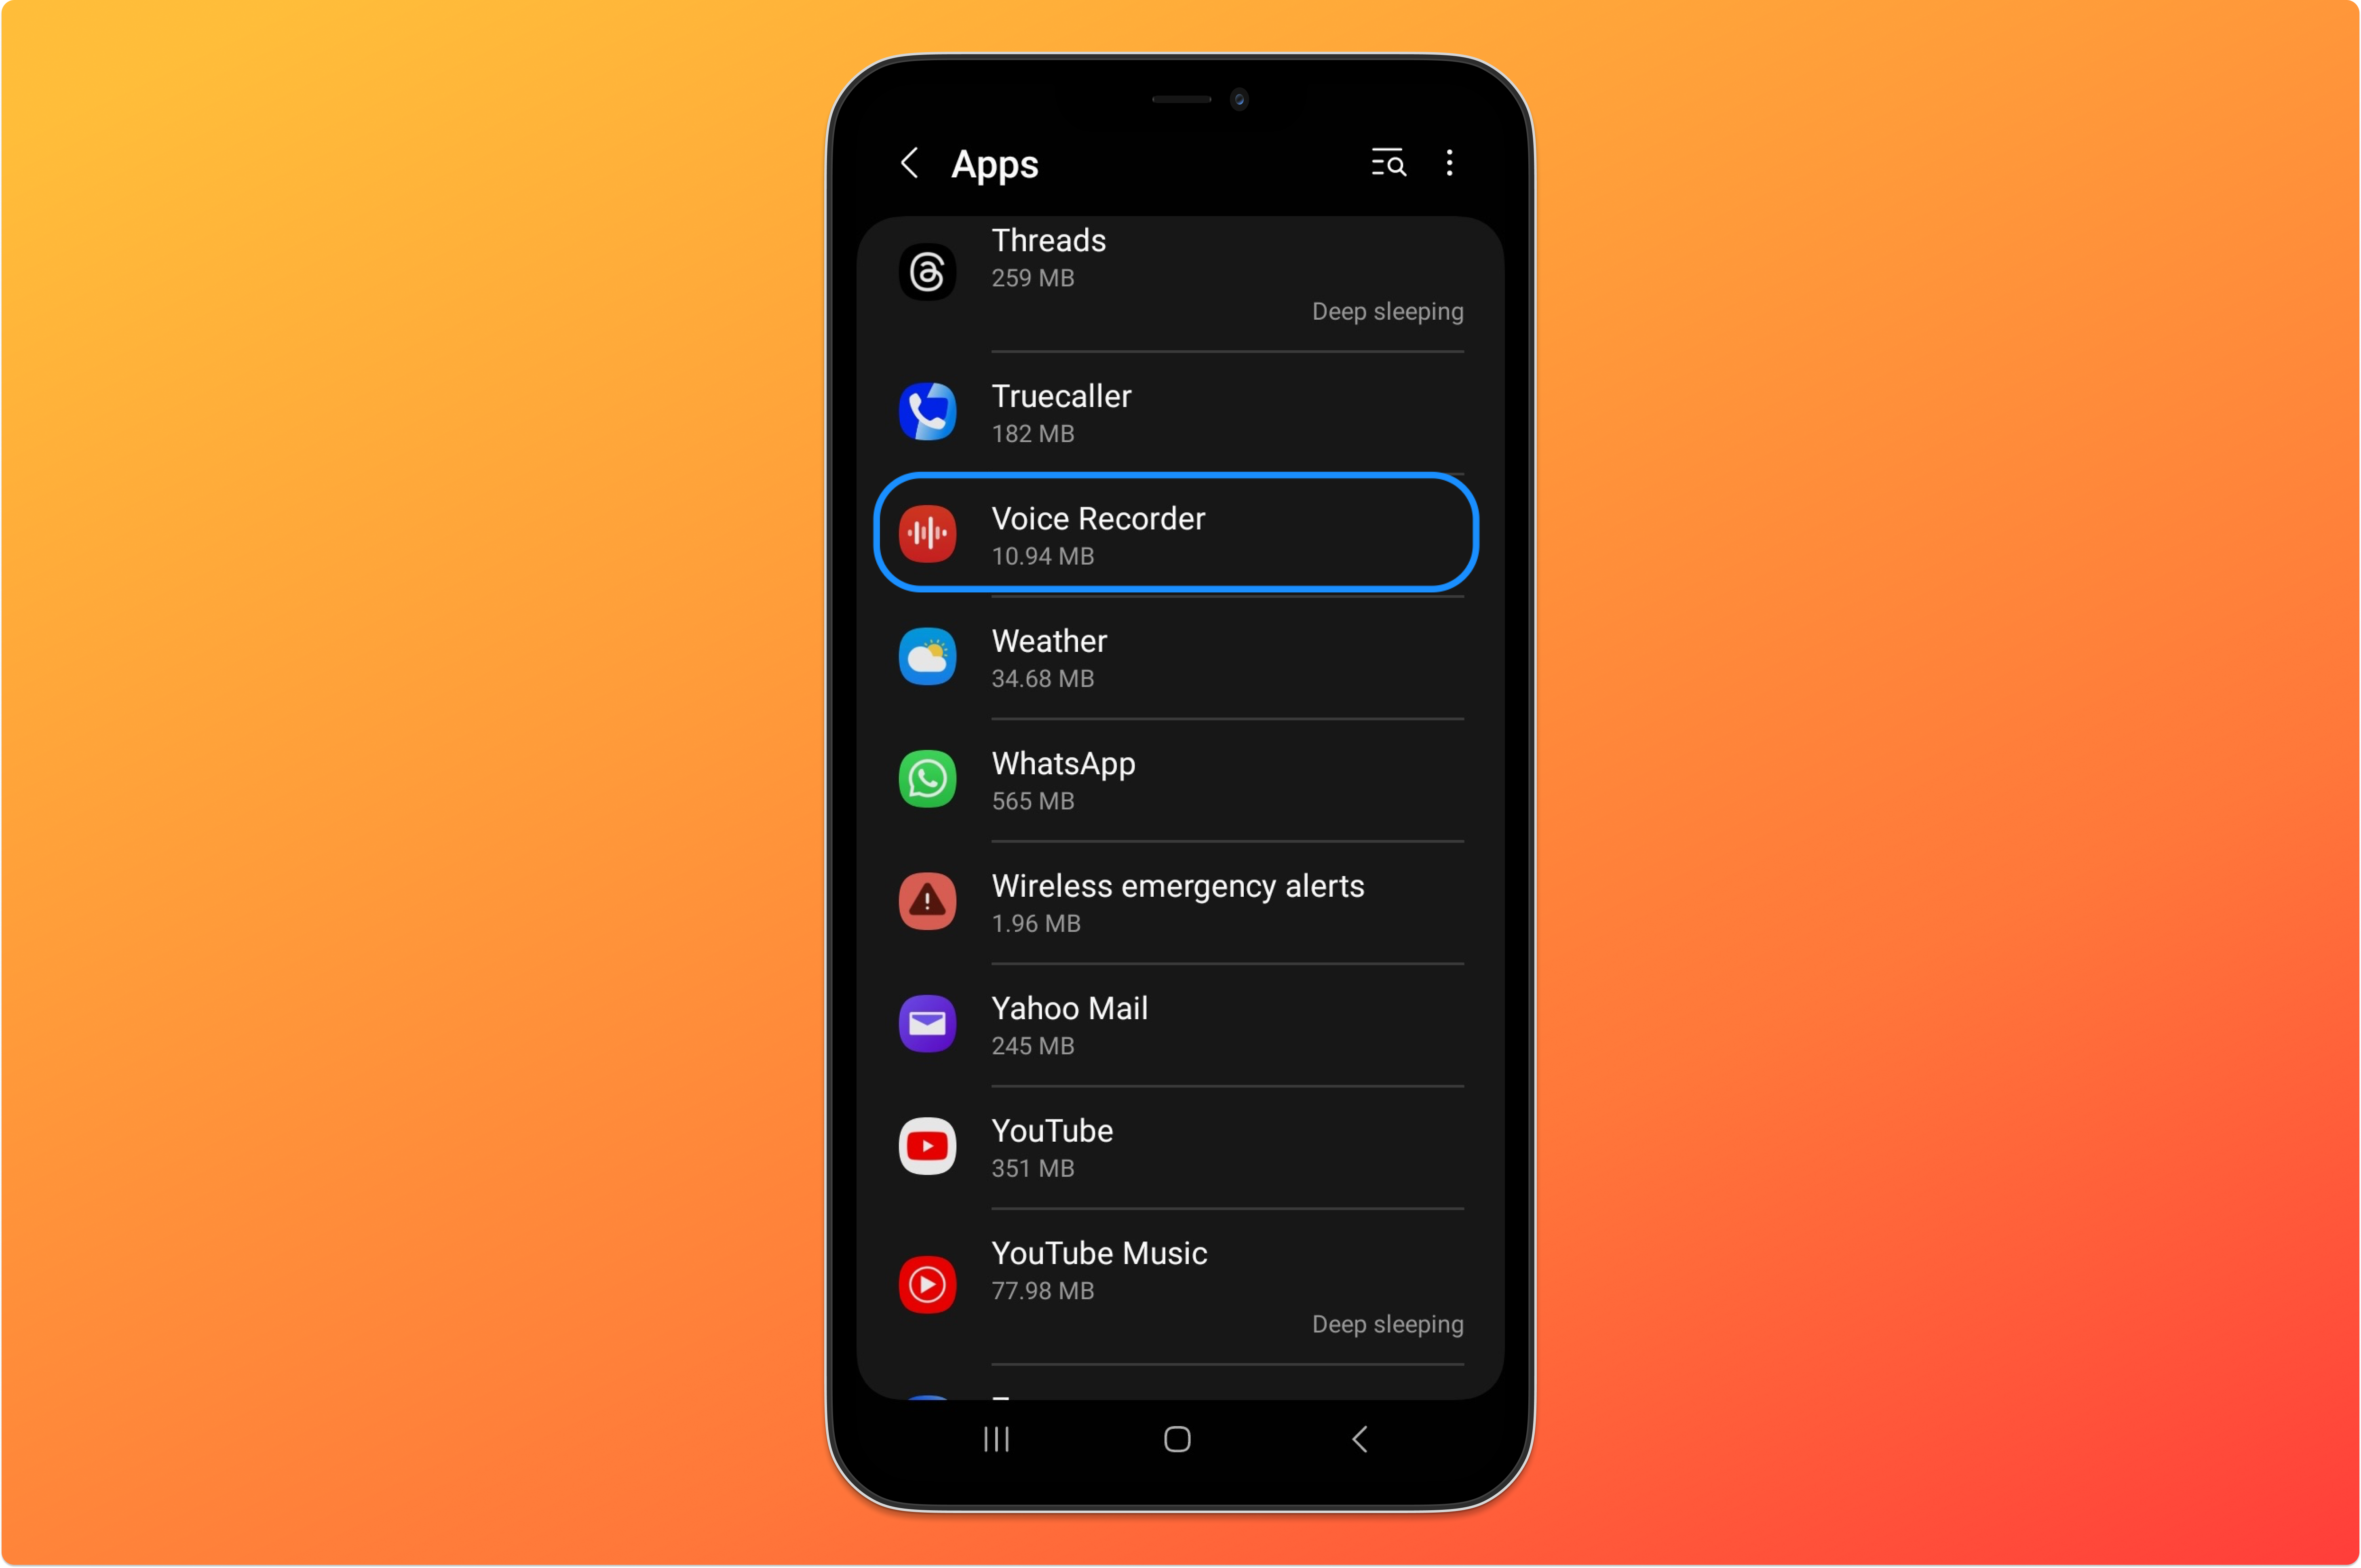
Note: Most Android smartphones or tablets ship with the Voice Recorder app. If you can’t find the app, download it from the Google Play Store or the Galaxy Store (for Samsung users).
Step 2: If you’re using Voice Recorder for the first time, you’ll be prompted to allow microphone permissions.
Step 3: Tap the Record button to begin recording. Speak clearly into the microphone.
Step 4: Once finished, tap the Stop button. Choose the name of the file, and finally click Save.
How to Record with Wudpecker’s Android App
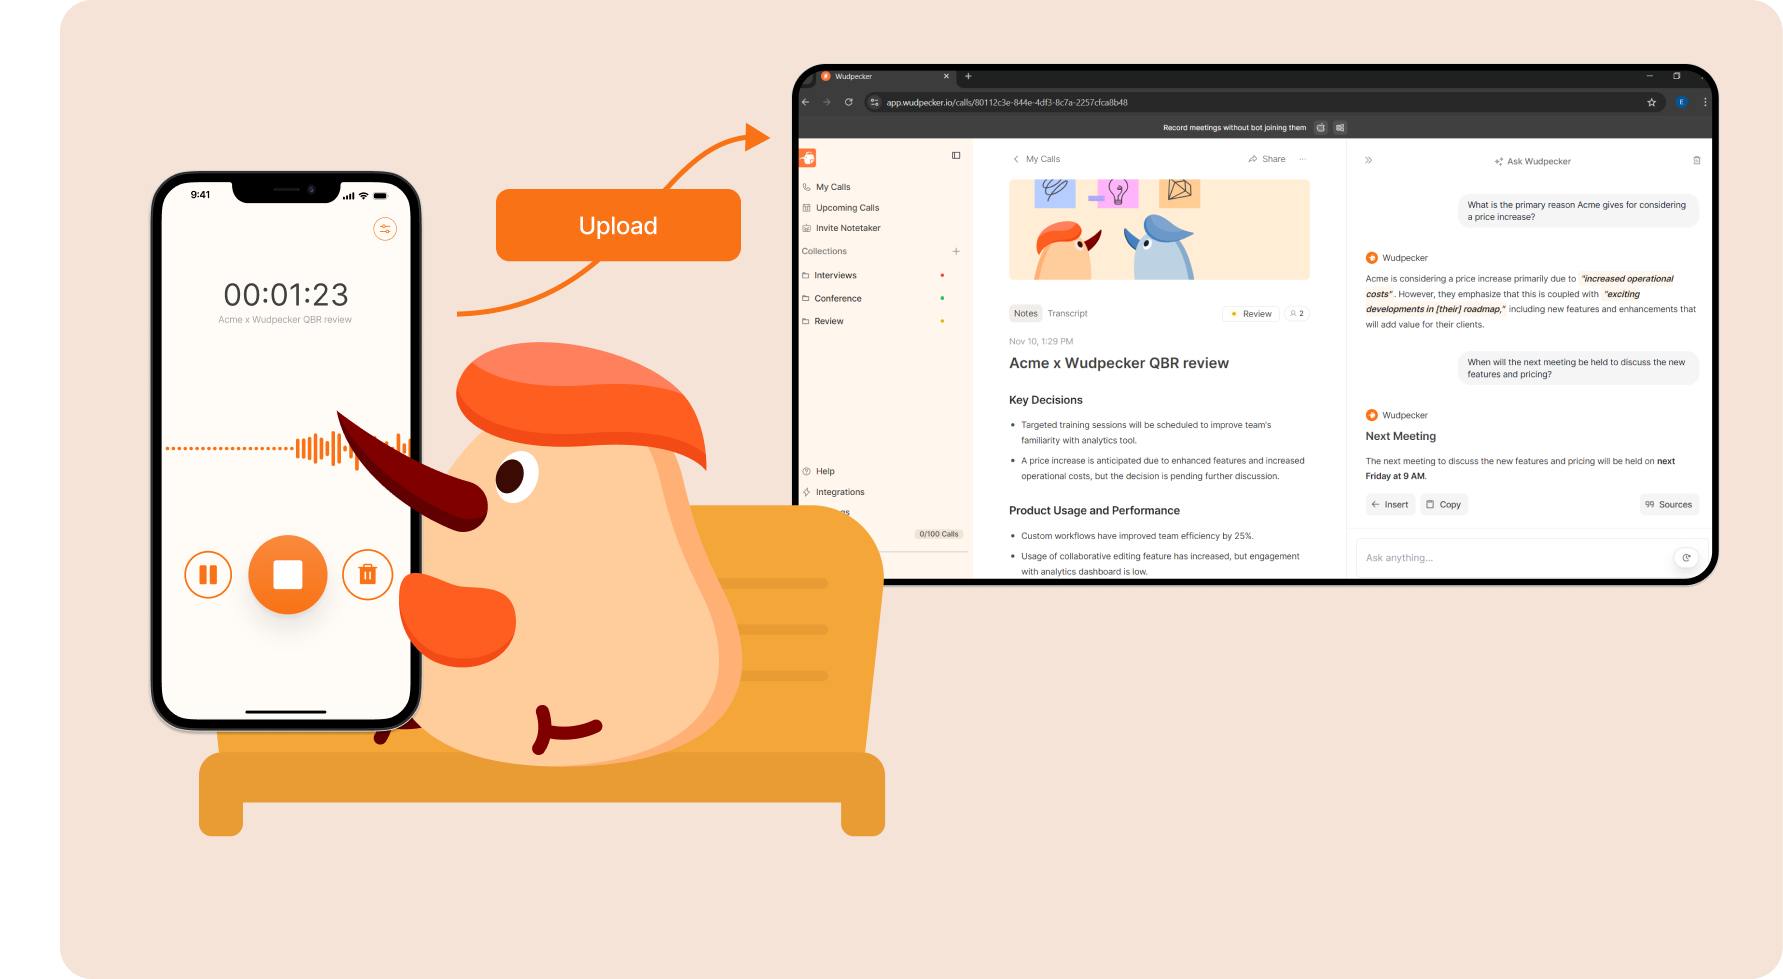
For a better experience compared to the native Recorder app, consider using Wudpecker’s Android app. It not only captures high-quality audio but also creates a transcript and notes, including key discussions, decisions made, and next steps. The native app only records audio.
Here's how to record your meetings in 5 simple steps with the Android app.
Setting up the app and your account
Step 1: Go to Play Store and search for Wudpecker. When you find the “Wudpecker In-Person” app, install it on your phone.
Step 2: Sing up or sign in to Wudpecker with your Microsoft or Google account. (A browser tab will automatically open for that).
Step 3: Give microphone access to record your meetings.
.gif)
Using the app
Step 4: Start recording. You can also pause and continue the recording any time, in case you don't want certain parts to stay on record.
Step 5: Once you’re done, stop the recording. Wudpecker automatically starts processing the notes and saves them for you in your Wudpecker account. You can access the notes in the browser. We recommend using a laptop or computer for the browser version.
What Wudpecker Offers That Your Native Phone App Doesn't
While the Recorder app provides basic audio recording capabilities, it lacks many features that feel essential.
Wudpecker comes out as a more useful alternative, offering a number of features designed to enhance the audio recording (and notetaking) experience.
Below are the key features that make Wudpecker a better choice for users looking to record audio on their Android phones.
(1) Save Time with Automatic AI Notes
Wudpecker not only records high-quality audio but also generates AI-powered notes and transcripts. Notes include a summary of the discussion points, decisions made, and more. Wudpecker also recognizes different speakers and their names. Notes are completely editable.
(2) Access Anywhere with the Companion Web App
With Wudpecker’s companion web app, you can access all your recordings, transcripts, and summaries from any browser. This functionality allows you to review and manage your audio content whether you're at your desk or on the go, ensuring you stay organized and productive.
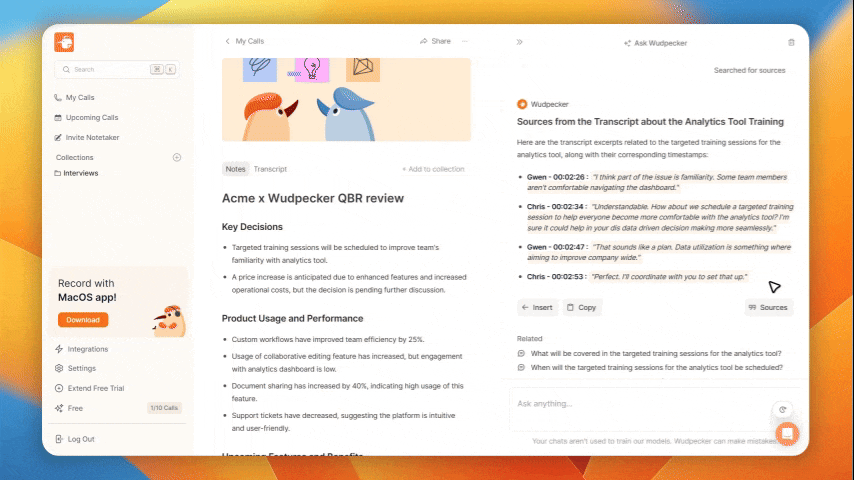
(3) Ask Wudpecker for Specific Insights
If you don't want to read through the entire meeting summary and just need specific information from the meeting, you can easily do that with the Ask Wudpecker feature.
You can create specific prompts (e.g., "What were the key takeaways regarding the new product launch?") or general instructions (e.g., "Ask to generate a table based on action items and deadlines"), and Wudpecker will provide you with the exact information you need. It already knows the context of your meeting’s discussions so you don’t have to explain it separately.
(4) Find What Was Said with Just One Click
Wudpecker can give you exact quotes from the conversation. You can even click on the quote and jump to the relevant part in the transcript. This way, you’re able to read or listen to specific parts of the transcript without having to go through the entire recording.
(5) Easily Share with Others
Sharing your audio recording, transcript, and notes with others is easy. You can simply share the URL link with anyone.
If you share the notes to someone’s email who also has a Wudpecker account, they get their own copy. This means that they can edit the notes however they want and have a unique chat with Ask Wudpecker without affecting your notes in any way.
.svg)


.png)


.png)


.png)


.png)


.svg)
